

Table of Contents
What Do I Need to Use a VST?
Virtual Studio Technology (VST) plugins have revolutionized the world of music production, providing musicians and producers with powerful tools to create, mix, and master music. However, if you’re new to music production, you might wonder: What do I need to use a VST? This comprehensive guide will walk you through the essentials, from the basic requirements to tips for getting started.
Understanding VST Plugins
What Are VST Plugins?
VST plugins are software tools that emulate instruments, effects, or audio processing techniques. They integrate seamlessly into Digital Audio Workstations (DAWs) and expand the creative possibilities for musicians.
Types of VST Plugins:
- VST Instruments (VSTi): These are virtual instruments like synthesizers, samplers, and pianos. Examples include Serum, Massive, and Kontakt.
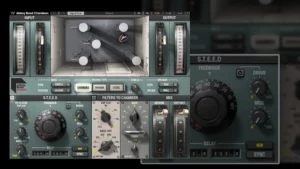
- VST Effects: These include compressors, equalizers, reverbs, delays, and more. Popular ones include FabFilter Pro-Q and Valhalla Reverb.
- VST MIDI Effects: These process MIDI data and can help with tasks like chord generation and arpeggiation.
Core Requirements for Using VST Plugins
1. A Computer with Sufficient Power
To use VST plugins, you’ll need a computer that meets the performance demands of music production.
Minimum Specifications:
- Processor: Intel i5 or equivalent.
- RAM: 8GB (16GB recommended for large projects).
- Storage: SSD for fast loading of plugins and sample libraries.
- Operating System: Windows 10 or macOS 11 and above.
Music production can be resource-intensive, especially when using multiple VST plugins. A powerful computer ensures smooth performance and reduces crashes.
2. A Digital Audio Workstation (DAW)
A DAW is the software that hosts your VST plugins. It’s where you’ll compose, record, and mix your music.
Popular DAWs that Support VSTs:
- FL Studio
- Ableton Live
- Logic Pro (macOS only)
- Cubase
- Pro Tools (with AAX to VST bridge)
Ensure that your DAW supports VST plugins, as some platforms like GarageBand have limited compatibility.
3. An Audio Interface
While not strictly required, an audio interface enhances audio quality and reduces latency. It acts as a bridge between your computer and external equipment like microphones, instruments, and studio monitors.
Key Features to Look For:
- Low-latency performance.
- At least one instrument input and one XLR mic input.
- Compatibility with your computer’s operating system.
4. MIDI Controller (Optional)
A MIDI controller allows you to play and control virtual instruments with physical keys, pads, or knobs. While not mandatory, it significantly enhances the creative experience.
Popular MIDI Controllers:
- Akai MPK Mini.
- Novation Launchkey.
- Native Instruments Komplete Kontrol.
5. Headphones or Studio Monitors
To accurately hear your music, invest in quality studio headphones or monitors. Consumer-grade headphones often color the sound, which can mislead your mixing and production decisions.
Setting Up Your VST Workflow
1. Install the DAW
Begin by installing your chosen DAW. Follow the manufacturer’s instructions for setup and activation.
2. Download and Install VST Plugins
Most VSTs come as downloadable files. During installation:
- Select the appropriate file type (VST2, VST3, AU for macOS users).
- Choose the installation directory carefully.
3. Load VSTs in Your DAW
In your DAW, navigate to the settings or preferences menu to locate the plugin folder. Once added, your VST plugins will appear in your instrument or effects list.
4. Configure Your Audio Interface
In the DAW settings, select your audio interface as the default input/output device. Adjust the buffer size for a balance between latency and performance.
5. Experiment and Explore
Open a VST plugin, experiment with its features, and familiarize yourself with its interface. Many plugins come with presets to help you get started.
Tips for Beginners
1. Start with Free Plugins
If you’re just starting, explore free VST plugins to understand the basics without a financial commitment. Plugins like Spitfire LABS and Vital offer excellent quality.
2. Learn from Tutorials
YouTube, forums, and online courses are invaluable for learning how to use specific plugins. Many companies also offer detailed guides on their websites.
3. Organize Your Plugins
As your collection grows, organize plugins into folders based on their function (e.g., instruments, effects) to streamline your workflow.
4. Keep Software Updated
Ensure that your DAW and plugins are up-to-date to avoid compatibility issues and gain access to new features.
FAQ
1. Can I use VST plugins without a DAW?
Yes, some standalone applications can host VST plugins, but using a DAW provides a more comprehensive environment for music production.
2. Are VST plugins free?
Many VST plugins are free, but premium options often offer superior sound quality, features, and customer support.
3. Can I use VST plugins on a laptop?
Absolutely. Just ensure your laptop meets the recommended specifications for smooth performance.
4. What’s the difference between VST2 and VST3?
VST3 is the latest standard, offering better performance, additional features, and enhanced compatibility. However, many plugins still use the VST2 format.
5. Do I need an internet connection to use VSTs?
An internet connection is typically required for downloading, activating, and updating plugins but not for their general use.
Conclusion
Using VST plugins opens up endless creative possibilities for music producers. With the right setup—including a DAW, audio interface, and a powerful computer—you can unlock the potential of these incredible tools. Whether you’re a beginner or a seasoned professional, investing in the right equipment and learning how to use it effectively is the first step toward producing high-quality music.
Start small, explore, and let your creativity flow!
Find My Labels, find Record Label Send Your Demo | findmylabels.com |
SM Mastering | Mix & Master Services smmastering.com